Appearance
邮件服务
我们可以使用免费的邮件服务比如 QQ 邮箱,但在发信数量和效率上是有限制的。所以使用阿里云付费邮件服务是高效和稳定的选择。

发信域名
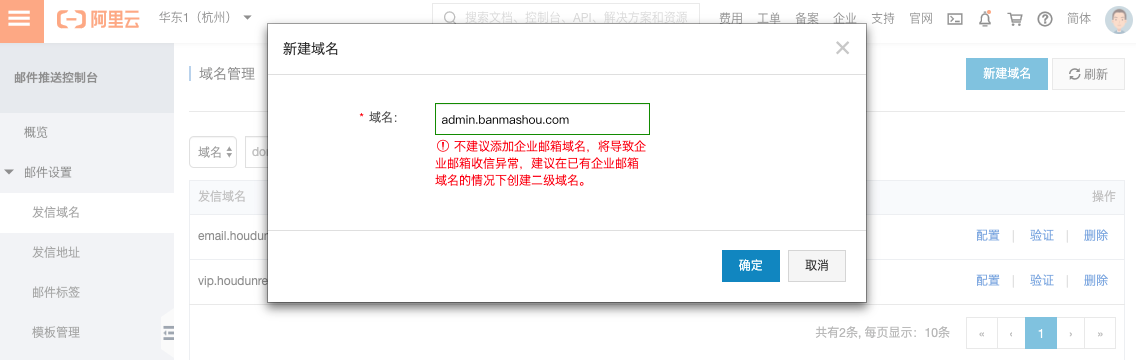
域名解析
点击发信域名中的配置链接,查看具体配置方式

在域名解析处设置发信域名解析

之后再回到发信域名处进行验证

发信地址
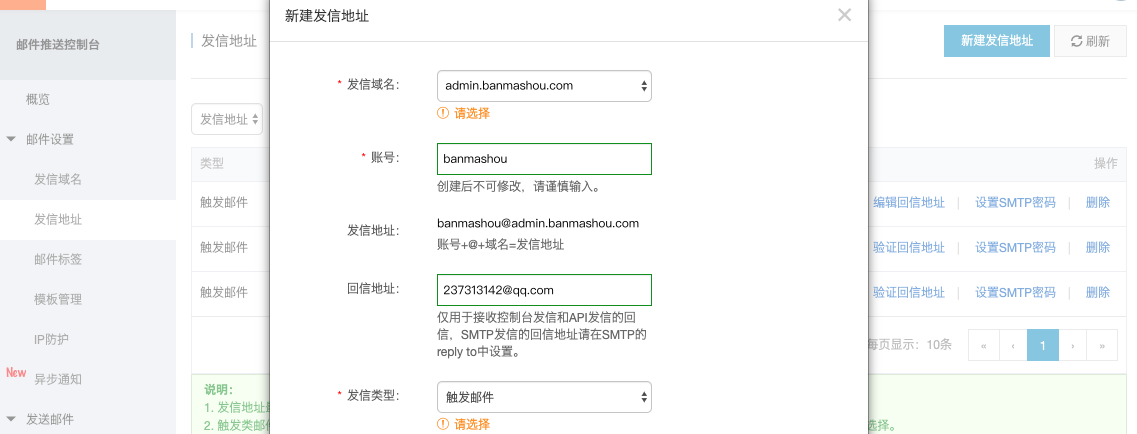
下面来配置发送邮件的发信地址
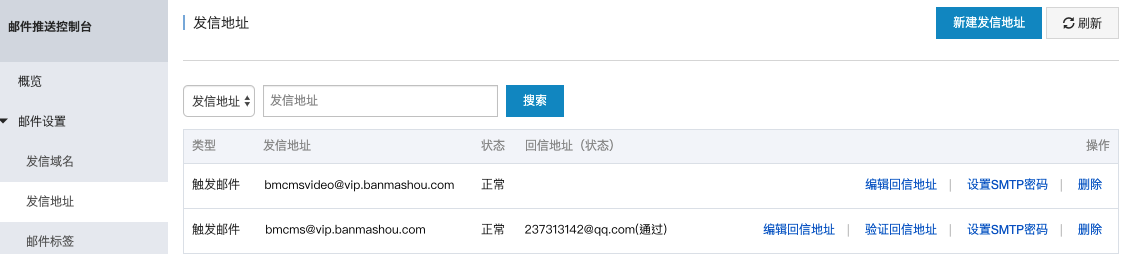
点击新建发信地址按钮进行添加
然后点击验证回信地址进行验证

点击收到的邮件链接进行回信地址的验证

STMP
下面来设置发信地址配置 SMTP 的发信密码,用于发送邮件时使用

现在可以在程序中发送邮件了,下面是程序中使用的配置
SMTP服务地址: smtpdm.aliyun.com
SMTP服务端口号:25或80或465(SSL加密)。
编码
下面是在 laravel 框架中使用邮件发送
邮件配置
修改 .env 配置文件中的邮箱配置
MAIL_MAILER=smtp
MAIL_HOST=smtpdm.aliyun.com
MAIL_PORT=25
MAIL_USERNAME=dev@admin.banmashou.com(阿时云中查看)
MAIL_PASSWORD=BANmashou8877(阿时云中查看)
MAIL_ENCRYPTION=null
MAIL_FROM_ADDRESS=dev@admin.banmashou.com(阿时云中查看)
MAIL_FROM_NAME="${APP_NAME}"
通知类
下面创建验证码邮件通知类
php artisan make:notification MailCodeNotification内容如下
<?php

namespace App\Notifications;

use Illuminate\Bus\Queueable;
use Illuminate\Contracts\Queue\ShouldQueue;
use Illuminate\Notifications\Messages\MailMessage;
use Illuminate\Notifications\Notification;

class MailCodeNotification extends Notification
{
    use Queueable;
    //验证码
    protected $code;

    public function __construct($code)
    {
        $this->code = $code;
    }

    public function via($notifiable)
    {
        return ['mail'];
    }

    public function toMail($notifiable)
    {
        return (new MailMessage)
            ->subject("短信验证码")
            ->line("你的验证码是 {$this->code},请在 10 分钟内使用");
    }
}
注册服务
创建 EmailService.php 服务类,用于将邮件的发送集中管理
<?php

namespace Services;

use Auth;
use Illuminate\Contracts\Container\BindingResolutionException;
use Overtrue\EasySms\EasySms;
use Log;
use App\Models\User;
use App\Notifications\MailCodeNotification;
use Cache

class MailService
{
    /**
     * 发送验证码
     * @param mixed $mobile
     * @return mixed
     * @throws BindingResolutionException
     */
    public function code($email)
    {
        $code = mt_rand(1000, 9999);
				Cache::put("mail-code-{$email}", $code, 600);

        $user = new User;
        $user->fill(['email' => $email]);
        return $user->notify(new MailCodeNotification($code));
    }

    /**
     * 验证码校对
     * @param mixed $mobile
     * @param mixed $code
     * @return bool
     */
    public function checkCode($email, $code)
    {
        return Cache::get("mobile-code-{$email}") == $code;
    }
}
在 AppServiceProvider 的 register 方法中注册服务
public function register()
{
	...
	$this->app->instance('mail', new MailService);
	...
}
发送注册
下面添加邮件发送控制器
<?php

namespace App\Http\Controllers;

use App\Mail\CodeMail;
use Illuminate\Http\Request;
use Auth;
use App\Notifications\MailCodeNotification;
use Illuminate\Support\Facades\Mail;

class MailController extends Controller
{
    public function code()
    {
        app('mail')->code('237313142@qq.com');
        return $this->success('验证码发送成功');
    }
}
限流规则
在 RouteServiceProvider 中定义限流规则
RateLimiter::for('mail', function (Request $request) {
    return Limit::perMinute(1)->response(function () {
        return response('邮件发送过于频繁,请稍候再试', 429);
    });
});
然后在路由中使用限制中间件
Route::post('mail/code', [MailController::class, 'code'])->middleware(['auth:sanctum', 'throttle:mail']);